Be yourself; Everyone else is already taken.
— Oscar Wilde.
This is the first post on my new blog. I’m just getting this new blog going, so stay tuned for more. Subscribe below to get notified when I post new updates.
Be yourself; Everyone else is already taken.
— Oscar Wilde.
This is the first post on my new blog. I’m just getting this new blog going, so stay tuned for more. Subscribe below to get notified when I post new updates.
Throughout the blender lesson we discovered several tools to create models in blender. Since last update, we learned how to make parent objects and finish the model.
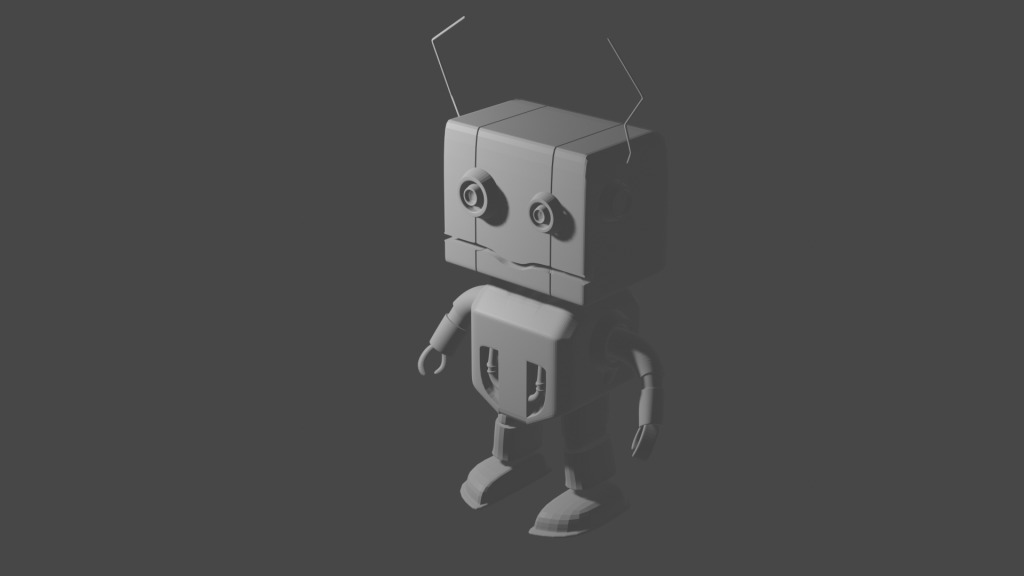
I really enjoyed this process and could see me doing this in my future.
Over the time we have been working with blender my understanding of how 3D modeling works has expanded greatly. All I learned has been too much to elaborate in the full depth it deserves in these usual short post, so I’ll try and keep it brief. Beyond just adding objects, I learned the importance of modifiers on modeling. These change the very base of what you are making dramatically. I have also become proficient in an array of tools to manipulate polygons to achieve the shapes I want. Still, I am not finished, but I have made a head, neck and body for the robot we are building for this lesson.

The last of our animate CC lessons, we learned to use the rest of the tools of a program to bring a character to life. We did this through not only applying older principles, but also classic tweens, connecting layers, adding audio, and even syncing a series of motion tweens.


Today we did lesson 4 of the Animate CC Classroom in a Book. In this lesson, we learned about advanced motion tweening. This expanded on lesson 3 with simpler tweens. Now we were practicing tween effects like easing in and out, speeding up, and tumbling.

There are some bits that could use work but I did get a grasp of the fundamentals.
This post is a bit late as this lesson was finished nearly a week ago now. In this lesson we practiced using the timeline in new ways. We learned about different tweens such as the motion tween, which makes animating alone a cakewalk. We also learned how to use a movie symbol properly over a graphic symbol, and how transformations work in concert with the timeline.

We took a quick break from the lesson in a book. During this lesson we practiced applying the principle of Squash and Stretch in Animate CC by using keyframes. We inserted keyframes before distorting the ball to ensure the warp effects only the intended frames rather than the whole timeline.

This was the first ball.

And this was the second.
This lesson had us make a logo for an imaginary coffee shop. Rather than an animated GIF like the last lesson, this lesson was a static image. The purpose of this lesson was to familiarize ourselves with the various shape building tools of animate CC. This was an interesting assignment because while I still used the material provided in the book I as well found other ways within the program to replicate similar effects.

As of January 8th, my animation class has been studying the Animate CC classroom in a book to understand the program. The first lesson was to familiarize ourselves with the timeline, the library, and the properties panel of the program, all fundamental components. Through this we did a small one hour mini project to make a short GIF.

This would be the short GIF project. There was a lot of quality loss while exporting the file type. Personal improvement is needed there.
Over the past month I worked with another aspiring animator Victor Diaz to make a small rotoscope animation.
Our first step was to record a video to draw on. We made a short 15 second clip. After condensing it to the manageable size of 8 frames per second, we could begin work.

After this would come the longest step that would take about 28 hours to finish. During this part Victor and I would split the video up between ourselves, draw an outline on the parent video frame by frame, and color it.
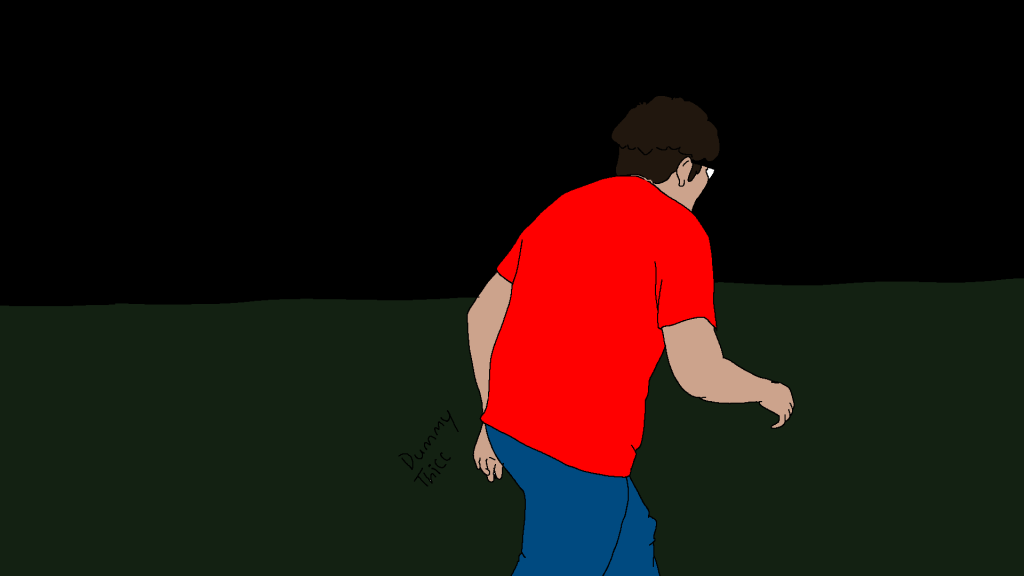
Finally, we put the pieces together into one video and uploaded it. Rotoscoping was an interesting process. It was very time consuming for a return of only about 15 seconds, but nonetheless was a good experience to have.
Our first step to becoming a real animator.
